Category: Uncategorized

  • Escape food coma with hibiscus!

    Escape food coma with hibiscus!

    Admittedly, I do somewhat enjoy the occasional food coma once in a while. It can be rather pleasant to drift off into a sleepy haze after a meal.

    However, sometimes there are things that need to be done, and what was supposed to be a brief doze can drag on for 2-3 hours. Forcing yourself to work while drowsy is so frustrating.

    There is plenty of advice on how to avoid a food coma. You know, eat smaller portions, decrease the carbs and the fat, and so forth. But, let’s say you already went ahead and ate the trigger foods and are on your way to la la land. What now? How does one stop the food coma once it has already begun, without resorting to caffeine?

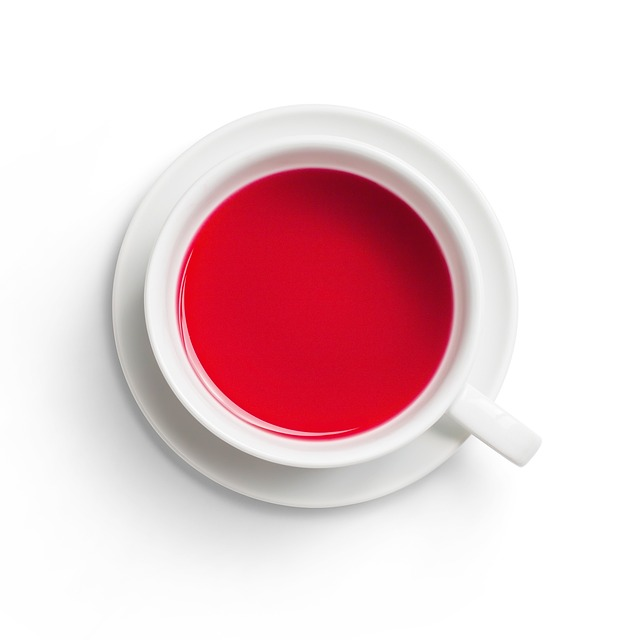
    Fortunately, I learned that a glass of ruby-red hibiscus tea will clear the fog of sleep and bring me right out of that slumber in short time!

    Someone I know shared this trick with me years ago. While I can’t say exactly why it works, I do have a pretty good idea why it does (based on science).

    What causes food coma?

    Strangely enough, scientists have not made much progress into what causes postprandial somnolence, which is what food coma is formally called. You can find studies showing that drinking caffeine in the afternoon keeps you up at night, yet an official cause for food coma is still a matter of debate.

    Go figure.

    That said, there are several theories circulating regarding what causes food coma. Here are some, in no particular order.

    Theory 1: Food coma is caused by the sudden spike in blood sugar after having a meal high in simple carbohydrates.

    Theory 2: More blood flows to the gut after a meal, thereby reducing blood flow to the brain – this one has been debunked.

    Theory 3: The sleepy state is brought on by consumption of tryptophan-rich foods.

    Theory 4: Various peptides, or digestive hormones, are released with fatty or protein-rich meals, causing satiety and sleepiness.

    Theory 5: We get sleepy because digestion is monopolizing our energy.

    Theory 6: Overeating brings about food coma, possibly due to reasons described in Theory 1, Theory 4, and Theory 5.

    Personally, I believe that it’s possible for food coma to be caused by a number of factors, so it’s possible that more than one of these theories could be correct. I found a study on two people whose lives were seriously impacted by food coma, and they were successfully treated after taking antidiabetic meds. Theory 1 is therefore supported. On the other hand, there are many anecdotes of people eating low glycemic meals like eggs and meat, with no carbs whatsoever, yet still experiencing food coma (look in the comments of the linked video). Perhaps Theory 3 is supported in this scenario?

    I think that Theory 1 supports why hibiscus works, and I’ll get into why below.

    Hibiscus lowers blood sugar

    And now we come to the mechanism by which hibiscus probably works: lowering blood sugar. That’s right; hibiscus most likely works by decreasing glucose levels brought on by blood sugar spikes. According to Dr. Tim Bond:

    “Various polyphenolic compounds are found in hibiscus tea. Ferulic acid is one such that appears to reduce blood glucose by reducing insulin resistance and levels of pro-inflammatory compounds in the blood. Other polyphenols in hibiscus may inhibit the enzymes that break down carbohydrates, thus delaying the breakdown of carbohydrates to glucose and lowering blood glucose.”

    It seems that my theory is correct. However, if someone is getting food coma for another reason, hibiscus tea might not work. If you have food coma and have pinpointed a reason other than blood sugar causing it, try the hibiscus tea and come share if it still worked for you.

    Making the tea

    While there are many types of hibiscus, the species most commonly used for tea-making is Hibiscus sabdariffa, also know as roselle.

    You may be confused by the large, light petals. They do not resemble the crumpled up, burgundy pieces in the typical bag of dried hibiscus. The part of the flower used is actually the fleshy red calyx, or the bottom part of the flower.

    I don’t use any special recipe to make the tea. I usually make it as follows:

    Small handful of hibiscus

    Two cups of hot water

    Leave to steep until the tea has almost cooled. By then, it will have developed the characteristic, beautiful, deep red color. Though the brew is quite tart, I do not take it with sweetener. You can, of course, sweeten it, but I don’t know if it will have the same effect.

    Disclaimer: I am not doctor, and nothing here is intended as medical advice.

  • I got rid of earwax with distilled water!

    I got rid of earwax with distilled water!

    Ear wax removal is not a pleasant prospect.

    When this unfortunate situation presented itself to me, I had to figure out how to deal with it. In the end, as the title gives away, I got rid of some bothersome earwax last September without ever going to the doctor.

    In case you were wondering: well, I hadn’t gone to the ear doctor, so how did I even know I had an ear wax situation?

    Well, after putting up with ongoing ear discomfort, I decided to buy an endoscope to take a look inside my ears. After all, what’s more convenient – a nerve-wrecking visit to the doctor or your own personal endoscope you can use to stare curiously at your tympanic membrane whenever you want? Well, definitely option B for me.

    I managed to purchase my own endoscope for less than $8 on Aliexpress. In comparison, the cost of visiting an ear, nose, and throat specialist (also known as “otolaryngologist”) is about $150. The time it took to ship my endoscope from China was about two weeks (if I remember right), which may have been as long as it would taken to get a doctor’s appointment.

    rid of earwax

    Actually, just looked this up, and yes, 2 weeks – or more precisely, 13.2 daysis how long it takes an appointment with an ear doctor in the USA.

    So, your question at this point might be: what do I have against ear doctors? Well, it’s nothing personal, and I did actively considering going to one for some time. I even wanted to try microsuction ear wax removal at a doctor’s office. Something that put me off was learning that the microsuction procedure can get as loud as 120 decibelsinside your ear canal! After all, it is literally like having a mini vacuum cleaner in your ears.

    It appears that ear doctors tend to use a saline or dilute peroxide solution to clean the inner ears. This seemed like something that can be done at home on a budget, using hydrogen peroxide drops. I did try this. The sensation of the hydrogen peroxide foaming in my ear was unpleasant, and the whole experience was very uncomfortable, even painful. It was my discomfort that prompted me into doing some more research. It appears that if you have a tear you are not aware of in your ear drum and the hydrogen peroxide gets inside, it can cause permanent damage to the middle ear. My endoscope had revealed that my ear drum was completely covered with wax, so there was no way I could determine if there was any such tear. Also, it appears that hydrogen peroxide can cause pain by irritating the skin, leading to inflammation. At any rate, I did not want to continue on this route after learning that.

    At some point, I tried removing the earwax using the clip-on little wax pick for the endoscope, but I gave up pretty soon. It was just too uncomfortable, the picture wasn’t clear enough, and the wax was too far down for me to use the pick on the shortest setting. I was leery of using it on the long setting. After all, who wants to accidentally jab an eardrum?

    Next, I looked into using olive oil drops. I believe that is how I came across the following video:

    This is how I learned that apparently ear wax is water soluble!

    The video suggested using steam distilled water. I got my hands on a gallon of this. Equipping myself with paper towels and an eye dropper, I decided to put this to the test. I used a small jar to warm some of the water in the microwave – not too much, just enough to make it comfortable to the skin. Then, I bent to one side in front of a mirror and carefully dispensed the warmed water into my affected ear (right ear) using the pipette. Then, I lay down on my opposite side on my bed and waited a few minutes. When I felt I had waited long enough, I applied the folded paper towel to my ear and flipped over quickly to drain it. There was just a small bit of wax, but enough to inspire me to keep going. I repeated the whole procedure, and to my disappointment, saw nothing on the napkin.

    My disappointment faded when I looked into my ear with the endoscope and saw my clean eardrum – praise God!

    Unfortunately, not having expected such rapid results, I had failed to failed to take before/after pictures. I wanted to get pictures, so I repeated the experiment on my left ear, which had some earwax built up on the side of the ear canal.

    My left ear was experiencing some discomfort when I was lying down with the water inside the canal, and it was temporarily muffled after three goes. The eardrum seems to be intact though (thank God), so I’m not sure what was the reason for the uncomfortable water-logged feeling I got. Interestingly, despite multiple flushes, I only succeeded in removing a dark layer of ear wax to reveal a lighter, yellow layer below. The wax didn’t just suddenly all dissolve like before.

    I suspect a reason it didn’t work so well this time is that the wax in my left ear was much farther away from the eardrum and closer to the ear opening than it had been in the right ear. Perhaps the wax hadn’t been completely submerged in the water each and every time I put the water in? It’s hard to say.

    And yes, I did take pictures. They didn’t come out too nice. The humidity in the ear canal had fogged up the lens of the little camera.

    Do you want to try this method out yourself? Here are the basic supplies you’d need; an endoscope, though fun, is optional. Let me know how it goes!

    rid of earwax